User-configurable delays in ESPHome
I'm starting to dip my toes into more home automation with Home Assistant and ESPHome, especially around some projects for PEACE. One specific project called for a default delay or timeout on an action, but also permitting user overrides on that timer. The key was also to do the logic and control on the ESPHome device as much as possible.
I found one existing approach for this at Dynamic timers in ESPHome, but that gets into quite a bit of interconnect lambda as well as doing a countdown (well, count up?) on a repeating 1-second tick on a timer.
On reading through the ESPHome Time Component and Datetime Component, though, it seemed like there might be what looks like a much simpler option. It turns out it works!
Requirements and project
Now, I had the same key requirements as from the Dynamic timers in ESPHome post. Copy-pasted:
- The user should be able to arm/dis-arm this timer remotely
- The user should be able to adjust this timer up/down remotely
- The updated time should become active immediately
- Should live 100% on device not require working network to function
The specifics of the project are taking a simple 3-speed pull-chain fan and making it "smart" and integrated with Home Assistant, with the overall objective adjusting the fan speed automatically based on the temperature. We have a number of these fans in enclosures for residents at the PEACE sanctuary, and having them adjust automatically to temperature changes ensures we can create well cooled spaces without wasting power and without making things too cold unnecessarily. The power thing is especially pertinent as some of the fans are running on a small solar power setup.
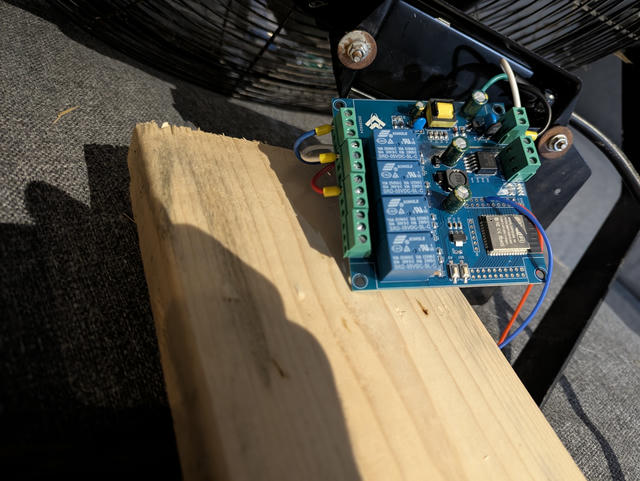
I may write more about that another time, but the gist is a 4-relay board with an integrated ESP32, that looks something like this in the initial pilot build (definitely with room for getting a smaller enclosure/case in the future):

A 4-relay ESP32 board attached to the rear of a 3-speed pull chain fan during build

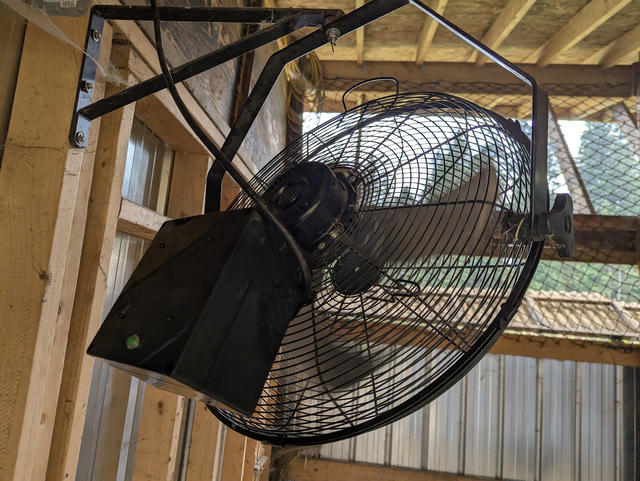
An initial "v1" of the 3-speed pull chain fan made "smart"
Motivation for user-configurable timer
The rationale for user-configurable timer or delay is basically the principle of least astonishment. While the fans can respond automatically to temperature changes, we still want to provide the user with an option for local control and to override the automatic adjustment. While the pull chain is removed, a push button is installed on the unit. Someone can still manually cycle through the fan speeds by pressing the push button.
If the user does press the button to manually set the fan speed, though, we don't want a temperature update to land the very next moment and then update the fan speed that the user just set explicitly.
To address that, we can temporarily disable the automatic, temperature-based fan speed control. But, we have to figure out what "temporary" means here. An hour probably seems fine, but maybe we only want 15 minutes, or maybe we want 2 hours, or 6. So, ideally, the user should be able to adjust the timer.
Lambda is fine, but what if...?
The thought for this popped up when reading the docs for the on_time option of the ESPHome Datetime Component:
on_time (Optional, Automation): Automation to run when the current datetime or time matches the current state. Only valid on time or datetime types. Use of on_time causes time_id to be required, time_id will be automatically assigned if a time source exists in the config, and will cause an invalid configuration if there is no Time Component configured.
Specifically:
Automation to run when the current datetime or time matches the current state.
Now, here's the thing: The Time Component is what you use to assign a real time clock source to the ESPHome device, e.g. from sntp, GPS, or from Home Assistant.
The Datetime Component is just...an arbitrary datetime. From the description:
A datetime entity currently represents a date that can be set by the user/frontend.
That's exactly what we want!
So, we have a time value that:
- is local to the ESPHome device
- can be set by the user through a frontend (Home Assistant)
- can trigger an action/automation when that time matches another time source
In theory, all this requires from us is to:
- set up a clock source on the ESPHome device
- create a datetime object for when we want the delayed action to run
- set up the action trigger in the
on_timeparameter of that datetime object.
It effectively gives us the ability to run a scheduled task!
The goods
Specifically, I use the Template Datetime for this.
First, we set up the actual time source. I'm just using the Home Assistant time source, but you can use sntp or whatever suits:
time:
  - platform: homeassistant
    timezone: "America/Vancouver"
    id: hass_time
The thing I actually want to control is this "manual override" button, that will disable the temperature-based automatic fan speed control. That is just a template switch:
switch:
  - platform: template
    name: Manual Override
    id: manual_override_enabled
    device_class: switch
    entity_category: "config"
    optimistic: True
I set optimistic to True here as I'm not actually triggering any actions from the switch directly. In other words: we're not setting a turn_on_action or turn_off_action on the switch; we're just using it as a boolean variable we can reference elsewhere when deciding whether not to run the temperature-based fan speed control.
We then create our template datetime. This will take a bit of explaining, so I'll do that after the YAML snippet:
datetime:
  - platform: template
    name: Manual Override Reset Time
    id: manual_override_reset_time
    time_id: hass_time
    type: TIME
    optimistic: True
    on_time:
      then:
        - if:
            condition:
              - lambda: "return (id(hass_time).now().is_valid());"
              - switch.is_on: manual_override_enabled
            then:
              - switch.turn_off: manual_override_enabled
The id is how we can refer to this datetime elsewhere, which we will use when we need to set this datetime.
The time_id refers to the actual time source we're checking against. When the time set here matches the time of our time_id time source, on_time will be run. For example, if we set our manual override reset time here to 16:00, then when the clock strikes 16:00 in our hass_time time source, the action we define here will be triggered. The docs indicate that if we have only one time source then, as we do with hass_time in our case, then it will be selected automatically, but I prefer to be explicit.
The type can be either date or time. We don't need to schedule things days in the future at a specific date, so we just use time for simplicity.
We set optimistic here as we just want a static time value. We don't want to trigger a set_action when we update the value of this datetime, and we don't want to run a lambda to update its value periodically.
Now the actual actions for on_time!
First: Our time source (hass_time) is not guaranteed to have been set and sync'd! The docs for the Time component recommend checking that the time source has valid time before triggering any actions from it, so we use the lambda described in the Time Component's time.has_time Condition to do that.
We then check if our manual_override_enabled switch is on and if so proceed to turning it off. Again: We can probably just set it blindly as turning it off won't cause any harm if it's already off to begin with, but I prefer to be explicit on conditions to not step into the actual task execution unless everything passes.
But...none of this has actually set the time yet!
In my case, this all gets hooked up to a physical button on the fan. If the user pushes the button, we want pause the automatic fan speed control for an hour, meaning we want to turn on the manual override, calculate how long it is until an hour from now, and then set our manual_override_reset_time datetime to that time.
The button on my setup is on GPIO 27, but really the stuff we care about here is in the on_press action definition:
binary_sensor:
  - platform: gpio
    name: Button Sensor
    id: button1_sensor
    pin:
      number: 27
      inverted: True
      mode:
        input: True
        pullup: True
    filters:
      - delayed_on_off: 10ms

    on_press:
      then:
        - button.press: btn_fanspeed
        - switch.turn_on: manual_override_enabled
        - lambda: |-
            char str[21];
            const time_t oneHourInSec = 3600;
            time_t delayTime = id(hass_time).now().timestamp + oneHourInSec;
            auto call = id(manual_override_reset_time).make_call();
            strftime(str, sizeof(str), "%H:%M:%S", localtime(&delayTime));
            call.set_time(str);
            call.perform();
This physical button press hits the btn_fanspeed button that actually controls cycling through the relays on the fan to set the speed, so the button.press here just results in "actually do the manual action the user wants to cycle the fan speed". If you're purely looking for an action that sets up the timer/delay, skip this bit.
Second, we turn on the manual_override_enabled template switch we set up before, and that is used to control whether the automatic fan speed control is on. So, this indicates "and stop doing automatic fan speed control".
The lambda is where the magic happens. This automation is much less lambda and simpler logic than the dynamic timers post I found before, but we still have to do a little bit of lambda.
In effect, we:
- get our desired delay time in seconds (3600 seconds = 1 hour)
- add that to the current time
- set our
manual_override_reset_timedatetime to that "now + 1 hour" time
The call logic here is lifted straight from the lambda calls section in the Datetime component docs.
Result
And that's it!
You get a simple delay mechanisms that is local to the ESPHome device, but that also can be adjusted by the user through Home Assistant, and you can trigger actions based on that delay.
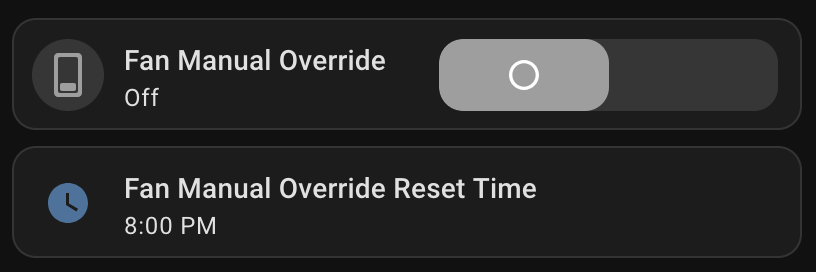
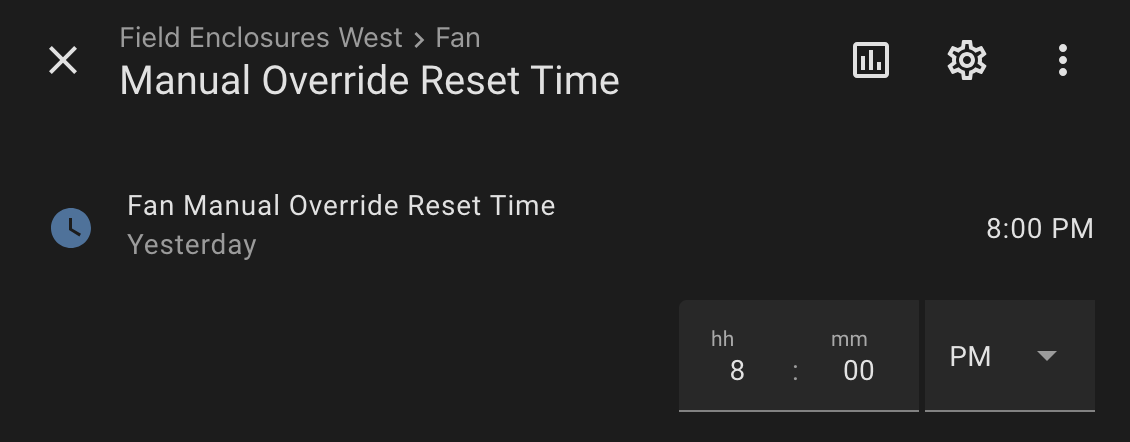
The pieces from my example show up something like this:


In my case this really just toggles a template switch that is referenced in other automation, but you can use it to do whatever you like!
Variations
I statically picked a 1-hour delay in my example. But, you could also instead use a template number with optimistic: True to allow the user to change the starting delay period through Home Assistant rather than having it hard coded into the ESPHome config.
My use case was this "manual override" for fan speed control, but simple other options could be something like automatically turning off a light or bathroom fan after a while, similar to the Dynamic timers in ESPHome post I referenced at the start.
Comments
Respond to this post with an account on the Fediverse (like Mastodon).